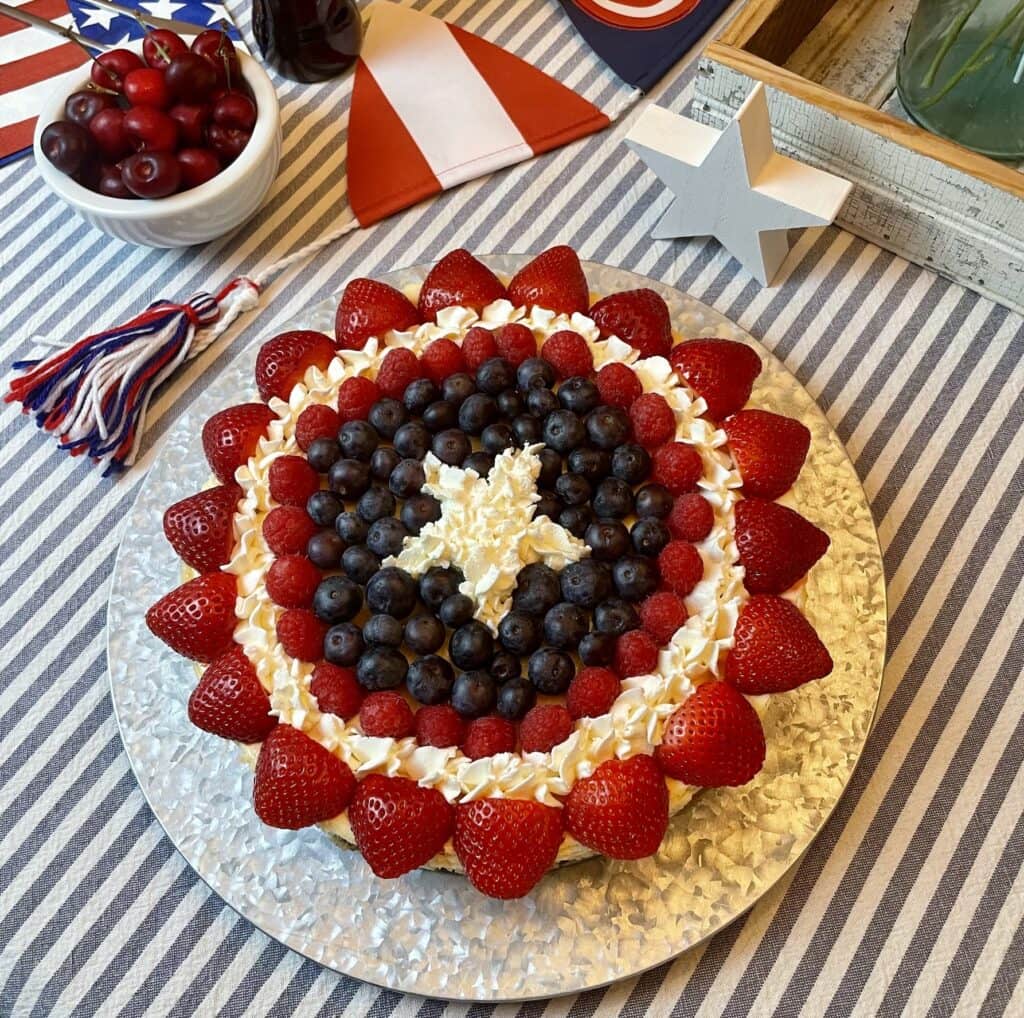

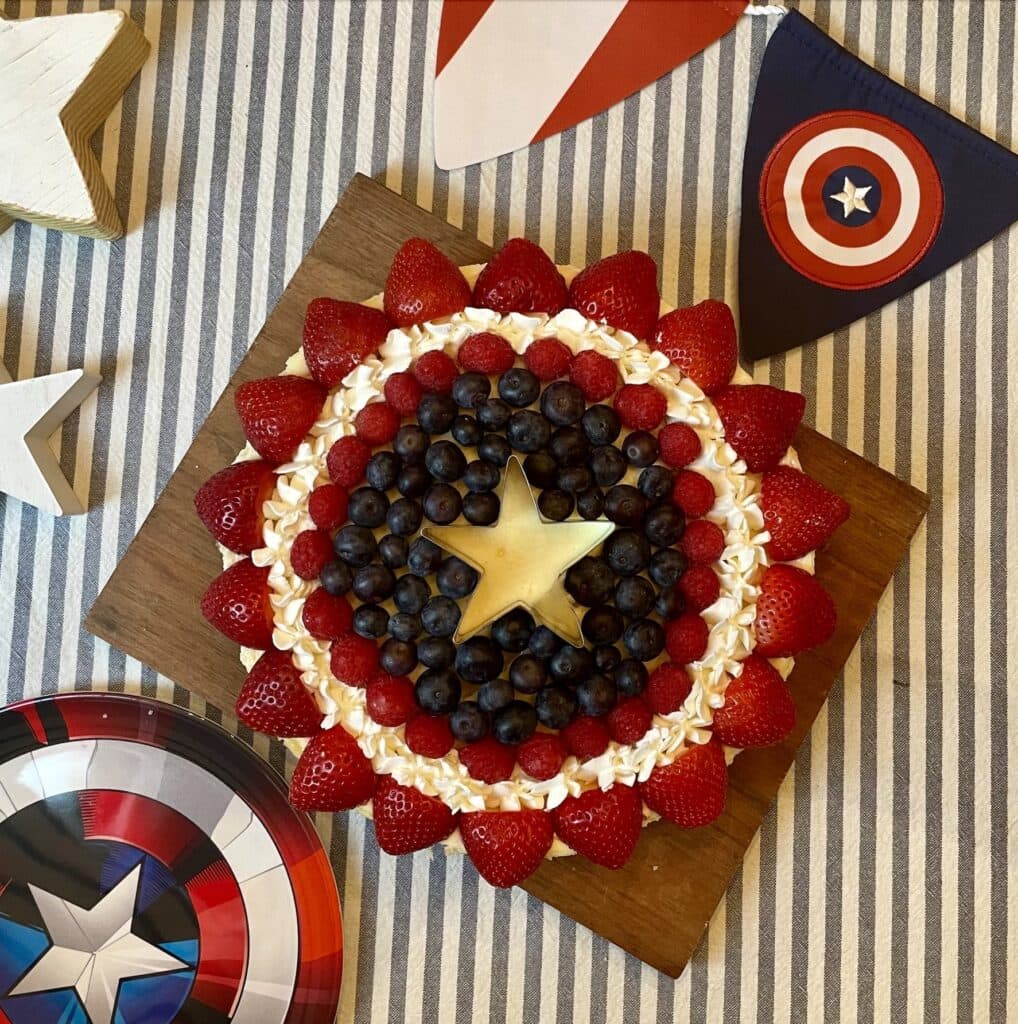
Captain America Shield Cheesecake
A classic baked New York-style cheesecake on a graham cracker crust, decorated with concentric rings of fresh strawberries, raspberries, blueberries, and piped whipped cream stars to recreate Captain America's shield — the centerpiece dessert for a 4th of July or Marvel themed party.
Equipment
- 9–10" springform pan
- Food processor
- Stand mixer or handheld mixer with paddle attachment
- Large roasting pan
- Heavy-duty aluminum foil
- Spatula
- 3" star cookie cutter
- Piping bag fitted with a star tip
- Sharp knife
Ingredients
Graham Cracker Crust
- 1½ cups graham cracker crumbs (about 12 full-sheet graham crackers)
- ¼ cup granulated sugar
- 5 tablespoons unsalted butter, melted
Cheesecake
- 32 oz. cream cheese, softened to room temperature
- 1 cup granulated sugar
- 1 cup sour cream, at room temperature
- 1 teaspoon pure vanilla extract
- 2 teaspoons fresh lemon juice
- 3 large eggs, at room temperature
Decorations
- Fresh blueberries, washed and dried
- Fresh raspberries, washed and dried
- Fresh strawberries, washed and dried, tops trimmed and halved lengthwise
- Whipped cream, placed in a piping bag fitted with a star tip
Instructions
Make the Crust
- Adjust the oven rack to the lower-middle position and preheat the oven to 350°F.
- Process the graham crackers in a food processor or blender until fine crumbs form. Pour into a medium bowl and stir in the sugar, then stir in the melted butter until the mixture resembles wet sand.
- Pour the crumb mixture into an ungreased 9–10" springform pan. Using the flat bottom of a measuring cup, press the crumbs firmly and evenly across the bottom and slightly up the sides. Bake for 10 minutes. Remove from the oven and set aside.
Make the Filling
- In a large bowl, beat the cream cheese and granulated sugar together on medium-high speed until completely smooth and creamy, about 2 minutes. Scrape down the sides of the bowl.
- Add the sour cream, vanilla extract, and lemon juice and beat until fully combined. With the mixer on medium speed, add the eggs one at a time, beating after each addition until just incorporated. Do not overmix after the eggs go in — overmixing incorporates air that causes the cheesecake to crack during baking.
Bake
- Wrap the outside of the springform pan in one or two sheets of heavy-duty aluminum foil, pressing it firmly up the sides to prevent water from seeping in during the water bath.
- Place the wrapped springform pan inside a large roasting pan. Pour the cheesecake batter over the crust and smooth the top with a spatula. Carefully pour about 1 inch of hot water into the roasting pan around the springform pan.
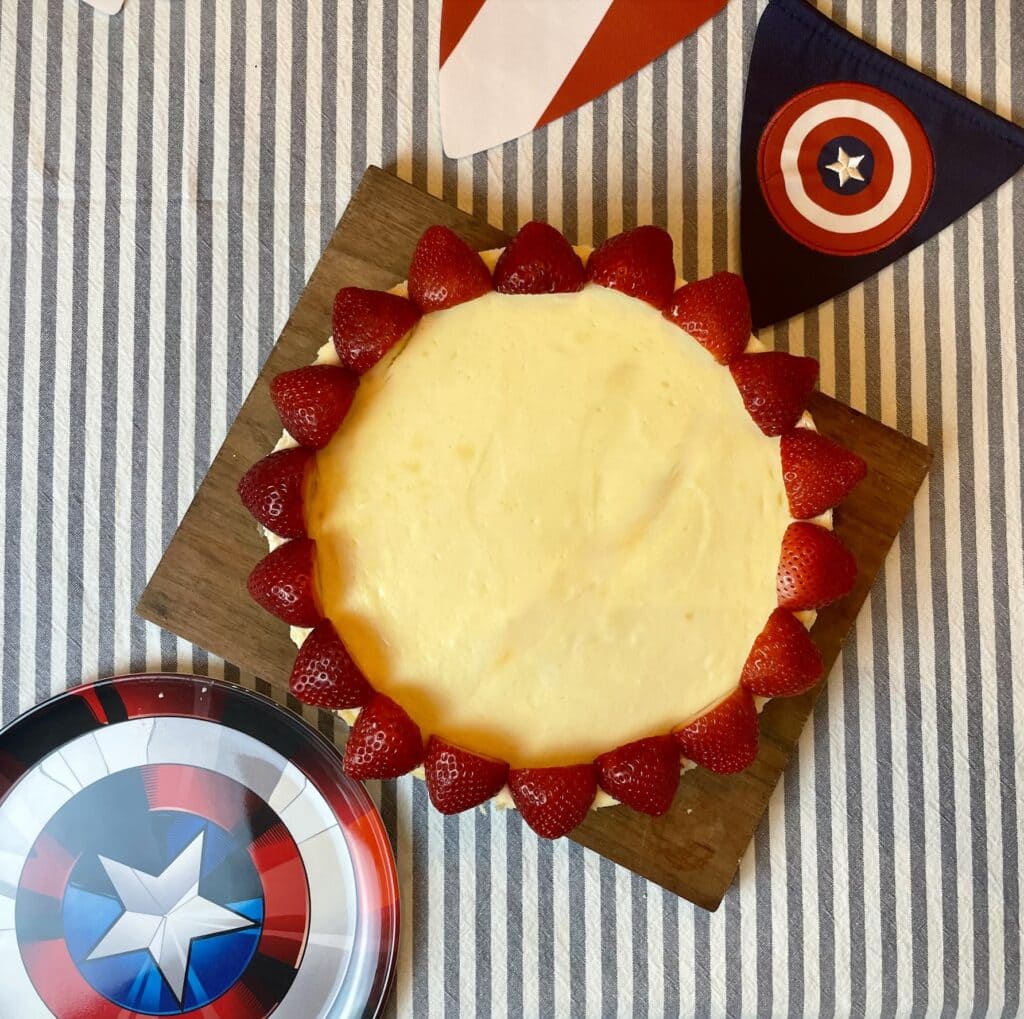
- Bake for 55–70 minutes, until the edges are set and the center still has a slight wobble when the pan is gently tapped. The center will firm up as it cools — pull it while it still moves slightly rather than waiting for it to look fully set.
- Remove the cheesecake from the oven and allow it to cool at room temperature for 1 hour. Cover and refrigerate for at least 4 hours, or overnight — the cheesecake is noticeably better after 24 hours.
Decorate
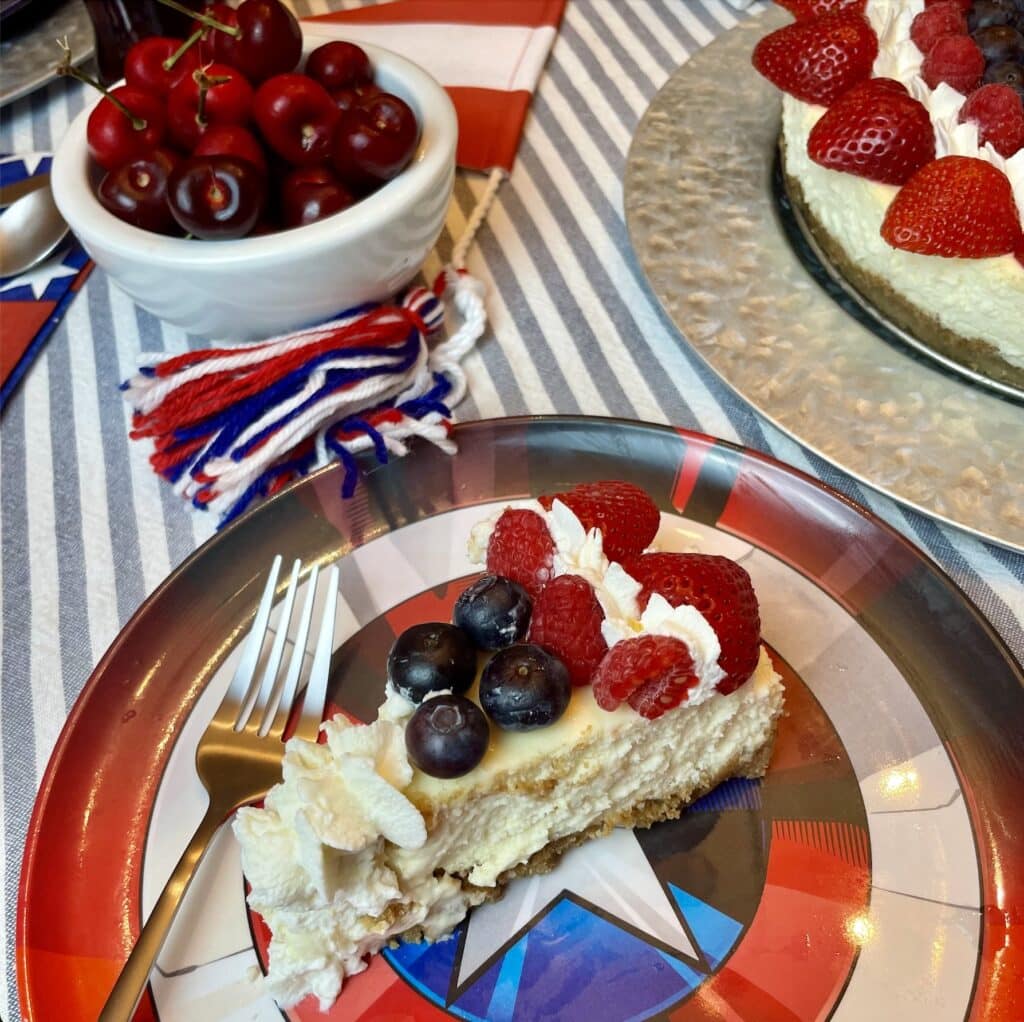
- When ready to decorate, run a thin knife around the edge of the springform pan to loosen the cheesecake, then remove the outer rim.
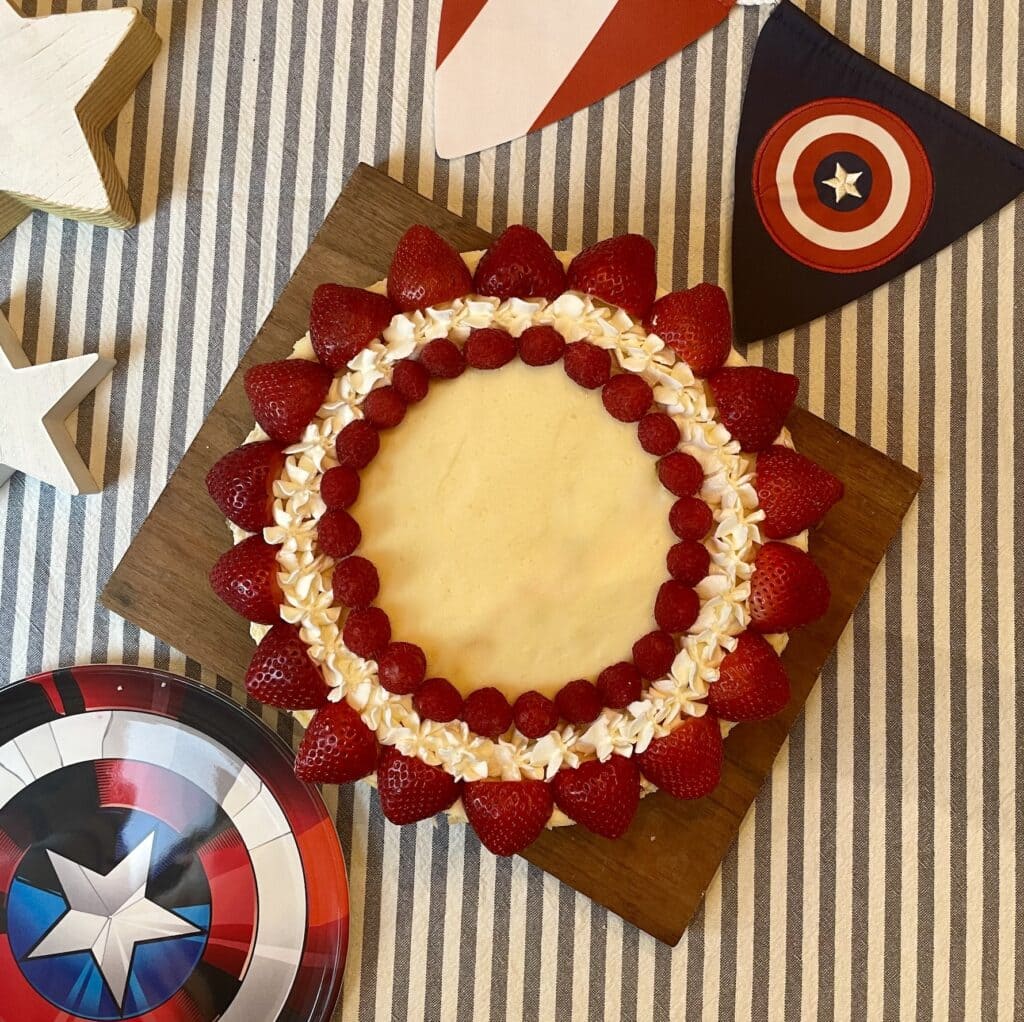
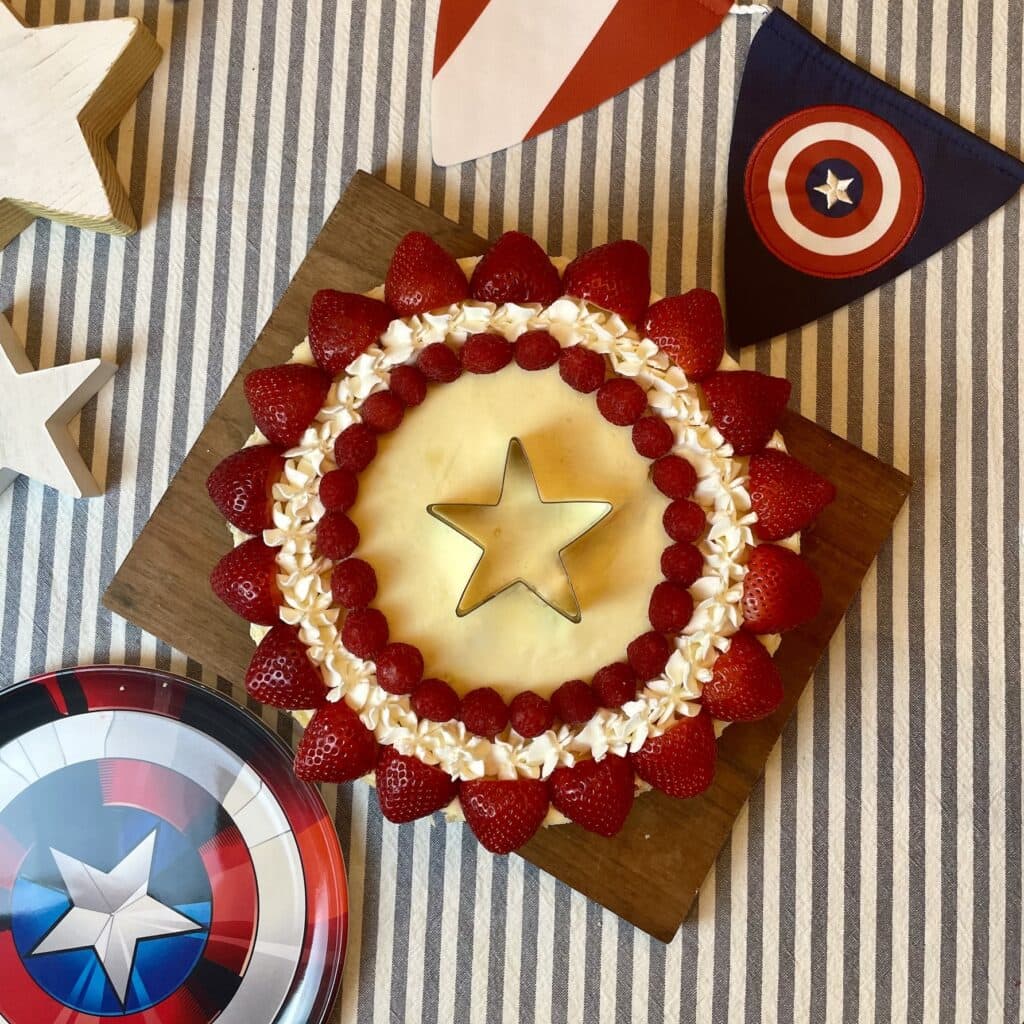
- Arrange strawberry halves cut side down around the entire outer perimeter of the cheesecake, standing them upright with the pointed tip facing outward so they fan around the edge like the red ring of the shield.
- Just inside the strawberry ring, pipe a row of small whipped cream stars using a star tip, creating a clean white ring between the strawberries and the fruit to follow.
- Arrange a ring of fresh raspberries just inside the whipped cream stars, pressing them gently into the surface so they sit level.
- Place a 3" star cookie cutter in the center of the cheesecake, pressing it lightly into the surface as a guide. Fill the area inside the cookie cutter with blueberries, arranging them in a tight even layer around the star shape but leaving the star itself empty.
- Carefully remove the star cookie cutter. Pipe small whipped cream stars to fill in the star shape in the center cleanly.
- Serve chilled straight from the refrigerator.

Leave a Reply