If you know Pooh Bear at all, you know there is nothing — not a single thing in all of the Hundred Acre Wood — more important to him than honey. So when I was planning our Winnie the Pooh party, it felt only right that the centerpiece should be a tree absolutely covered in sweet things. This Bee Tree is made from a styrofoam cone, fresh donut holes, and little candy bees on florist wire, and it comes together in about thirty minutes. It looks like something straight out of a storybook, it’s fully edible, and by the end of the party there’s usually nothing left but the cone. It’s part of our Winnie the Pooh Picnic — see the full party, tablescape, and menu there.
Our Inspiration
The bee tree pulls dual duty at a party table — it’s the centerpiece while everyone is arriving and serves as one of the desserts. I displayed ours on a log slab my dad made, which set exactly the right woodland tone. If you don’t have something similar, a natural wood serving board works just as well and gives you the same earthy feel. The whole thing comes together in about thirty minutes, which means you can make it the morning of and still have time to finish everything else.
How to Make a Winnie the Pooh Bee Tree

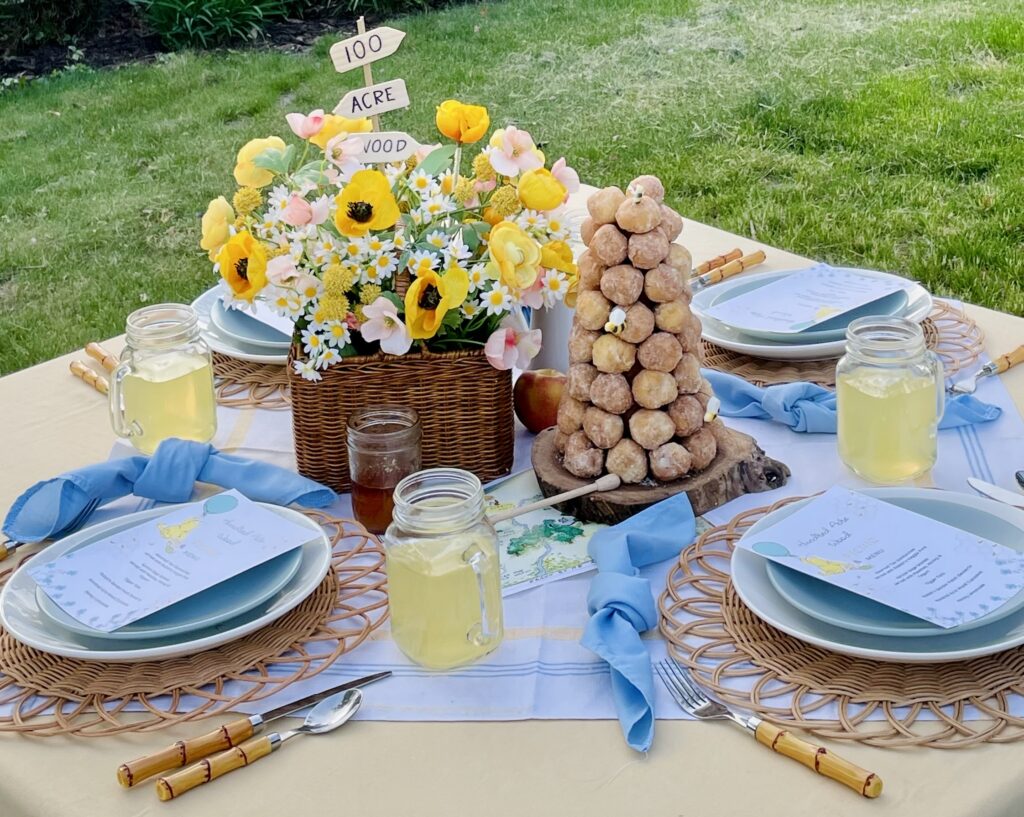
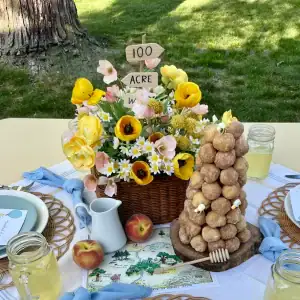
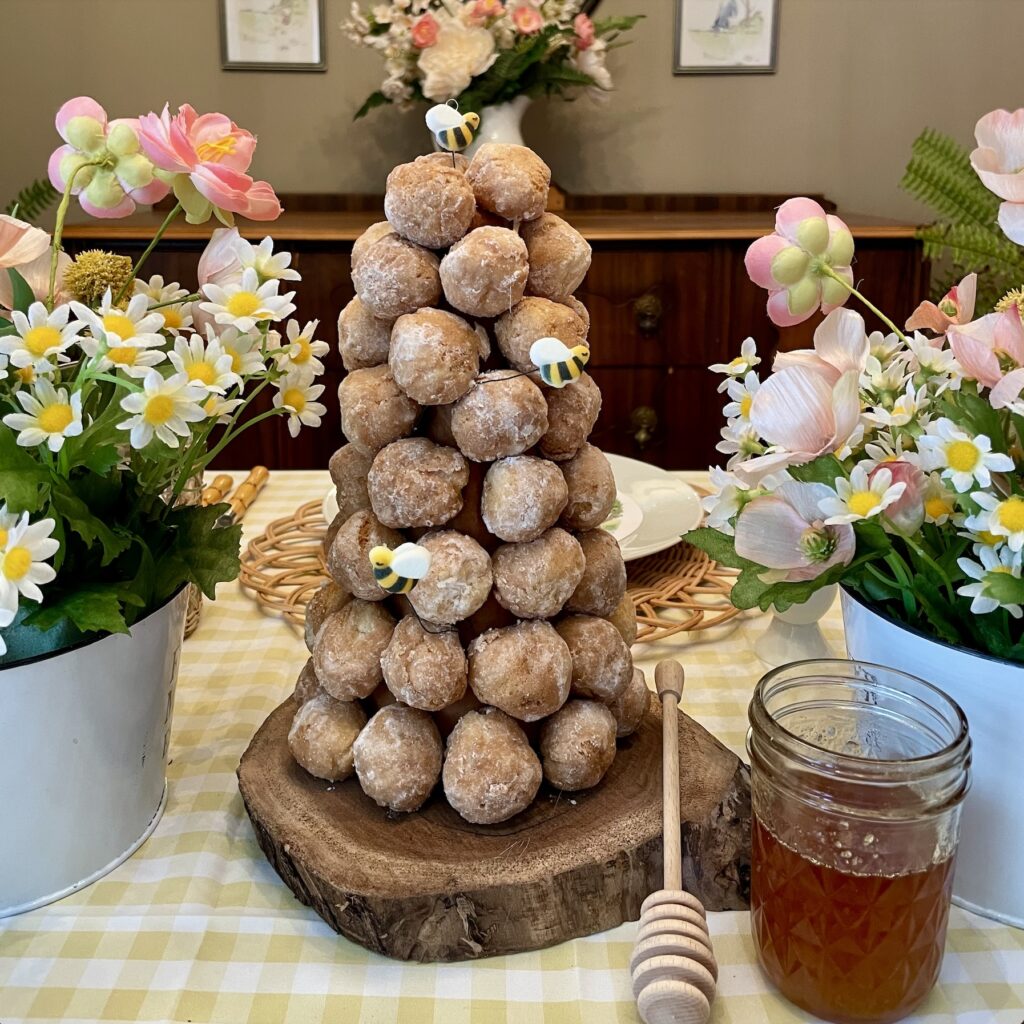
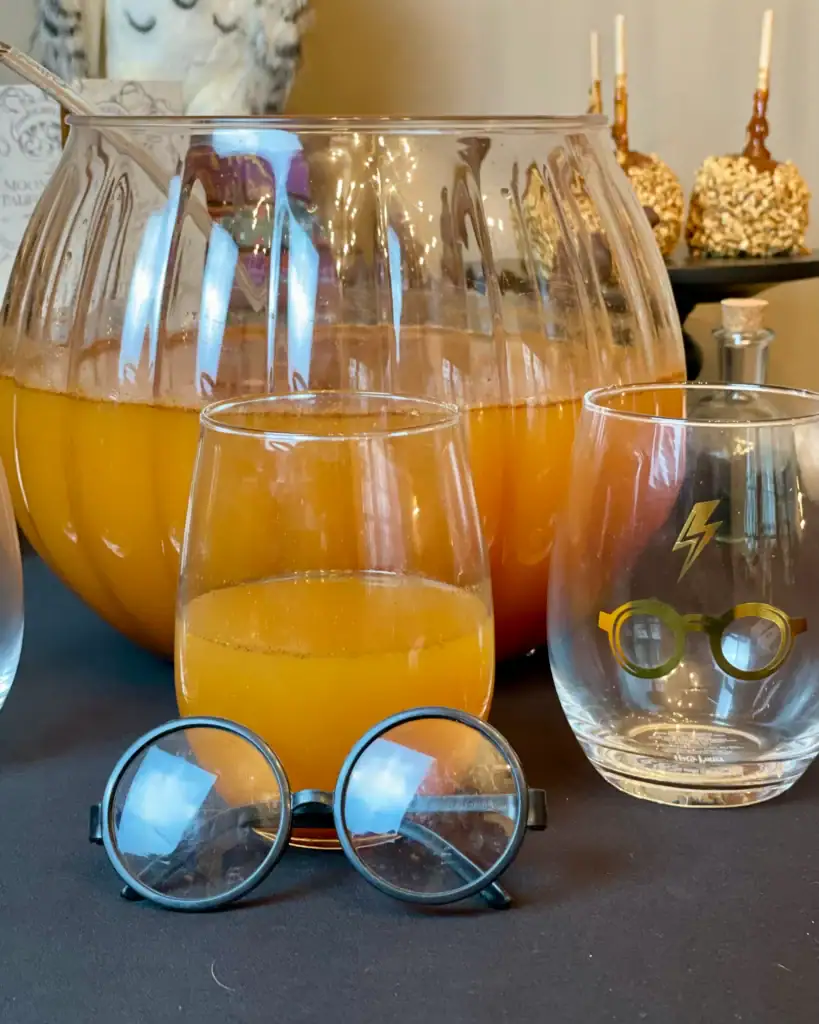
Winnie the Pooh Bee Tree Centerpiece
Equipment
- 8-inch styrofoam cone
- Beige tissue paper
- Toothpicks
- Hot glue gun and glue sticks
- Scissors
- Florist wire
Ingredients
- 48 Donut holes
- Small candy bees
Instructions
- Wrap the styrofoam cone with beige tissue paper to blend in color with the donut holes. Secure the paper with tape or hot glue.
- Insert toothpicks evenly around the cone, spacing them about 1½ inches apart.
- Place a donut hole onto each toothpick so the cone becomes covered with sweet "honey treats."
- Attach small candy bees to pieces of florist wire using hot glue.
- Insert the wire into the cone so the bees appear to be buzzing around the tree.
- Place the finished Bee Tree on your log slab or serving board as a centerpiece where guests can easily reach a sweet treat.
Tips and Tricks
- Buy donut holes the morning of. Fresh ones stay plump and soft on the toothpicks — day-old holes can shrink and pull away, which leaves gaps that are hard to fix once guests arrive.
- Beige or kraft-tone tissue paper disappears behind the donut holes. White will show through. If you can’t find beige, brown works well and leans into the bark-of-a-tree feel.
- Use hot glue rather than tape to secure the tissue paper. Tape loosens as the cone gets handled; hot glue holds from setup through the end of the party.
- Make the bees last. Add the donut holes as close to party time as possible, then wire in the bees right after. It’s a five-minute finishing step.
- A slightly irregular toothpick pattern looks more natural than a perfect grid. Work your way around the cone and fill gaps as you go.
- Can this be made ahead? Wrap the cone, add the toothpicks, and wire the bees up to a day ahead. Add the donut holes no more than a few hours before the party.
- This scales easily for larger parties — use a 10 or 12-inch cone and add more donut holes proportionally. The assembly is exactly the same.
On our picnic table this sat alongside the Eeyore Cupcakes, Honey Bee Cupcakes, and Rabbit’s Garden Patch desserts — and it was the first thing anyone touched. You can see the full dessert spread in our Winnie the Pooh Recipes roundup.


This looks so cute and delicious! I adore Winnie the Pooh, and I am also the BIGGEST donut fan, so this is absolutely perfect in my eyes 😍😋
Thank you so much! That makes my heart so happy to hear 💛 Winnie the Pooh and donuts really are the sweetest combination. I’m so glad it brought a little extra joy to your day!